Step 1
From the home screen of MyFitnessPal, select Diary from the bottom left navigation bar.
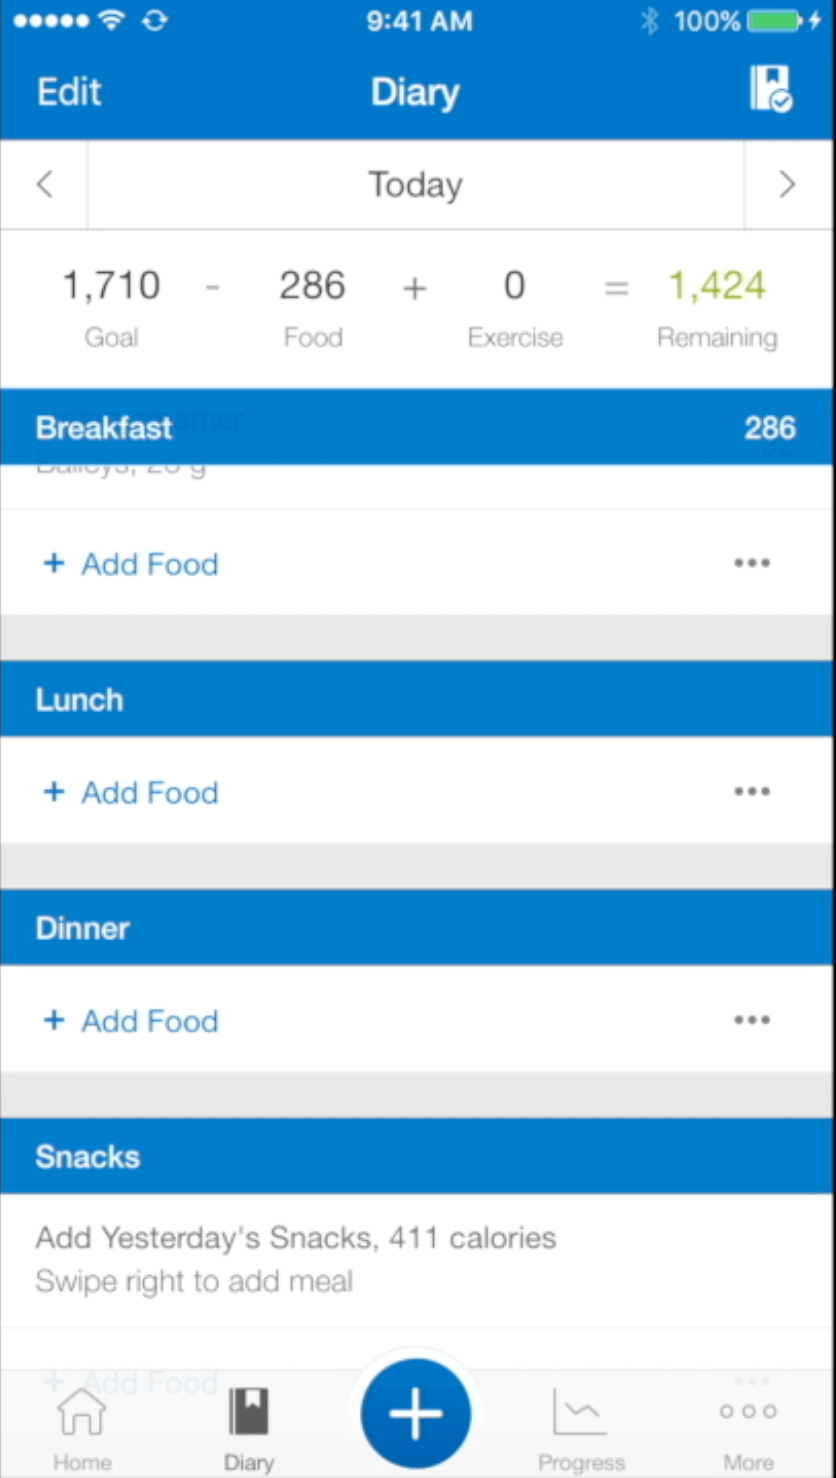
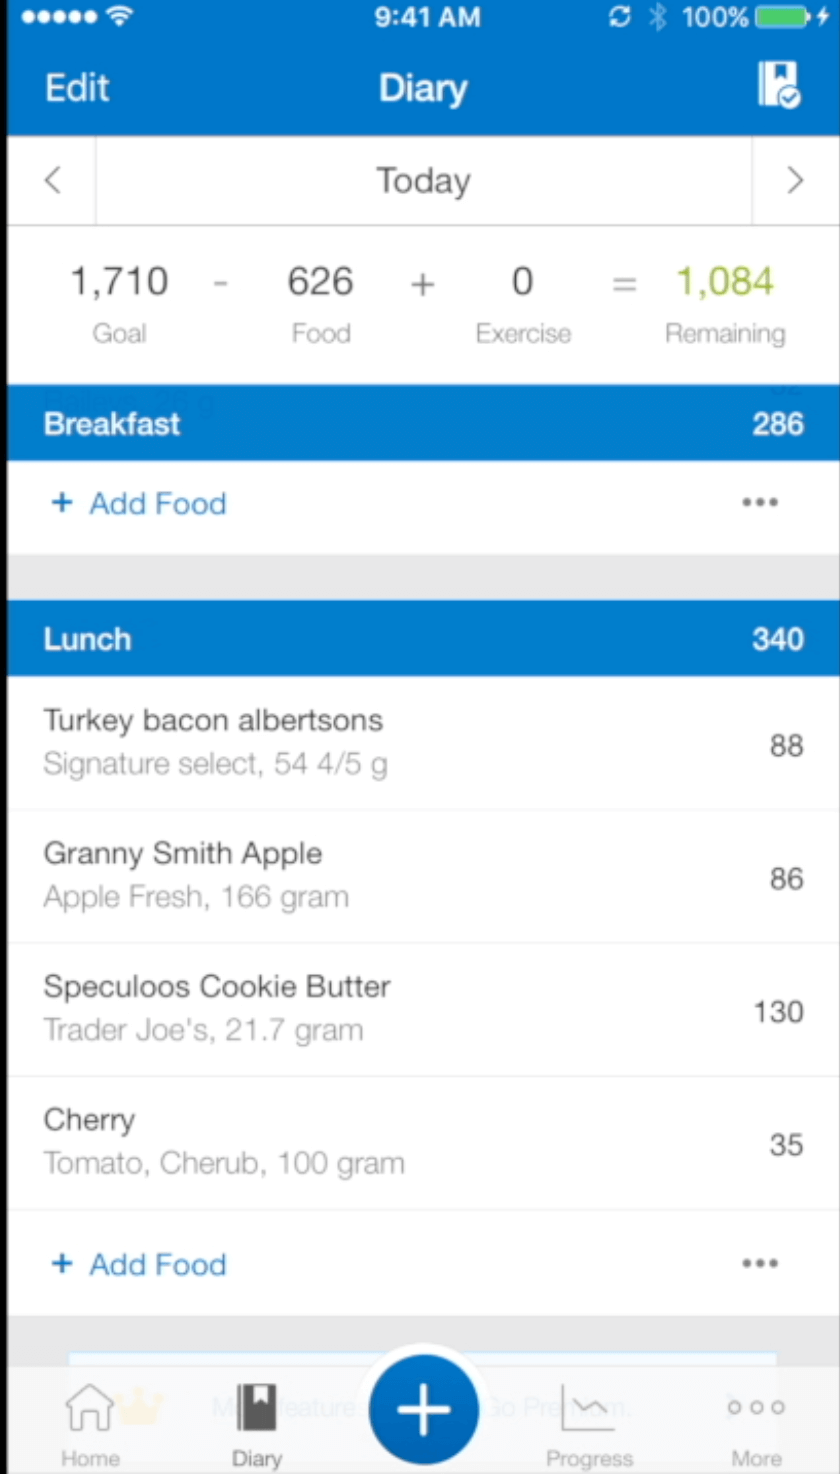
This is the MyFitnessPal food diary, used to log individual food items into the various meal times (Breakfast, Lunch, Dinner and Snacks).
To add a food into a mealtime, select the + Add Food button underneath any of the mealtime headings.
Advertisement
Step 2
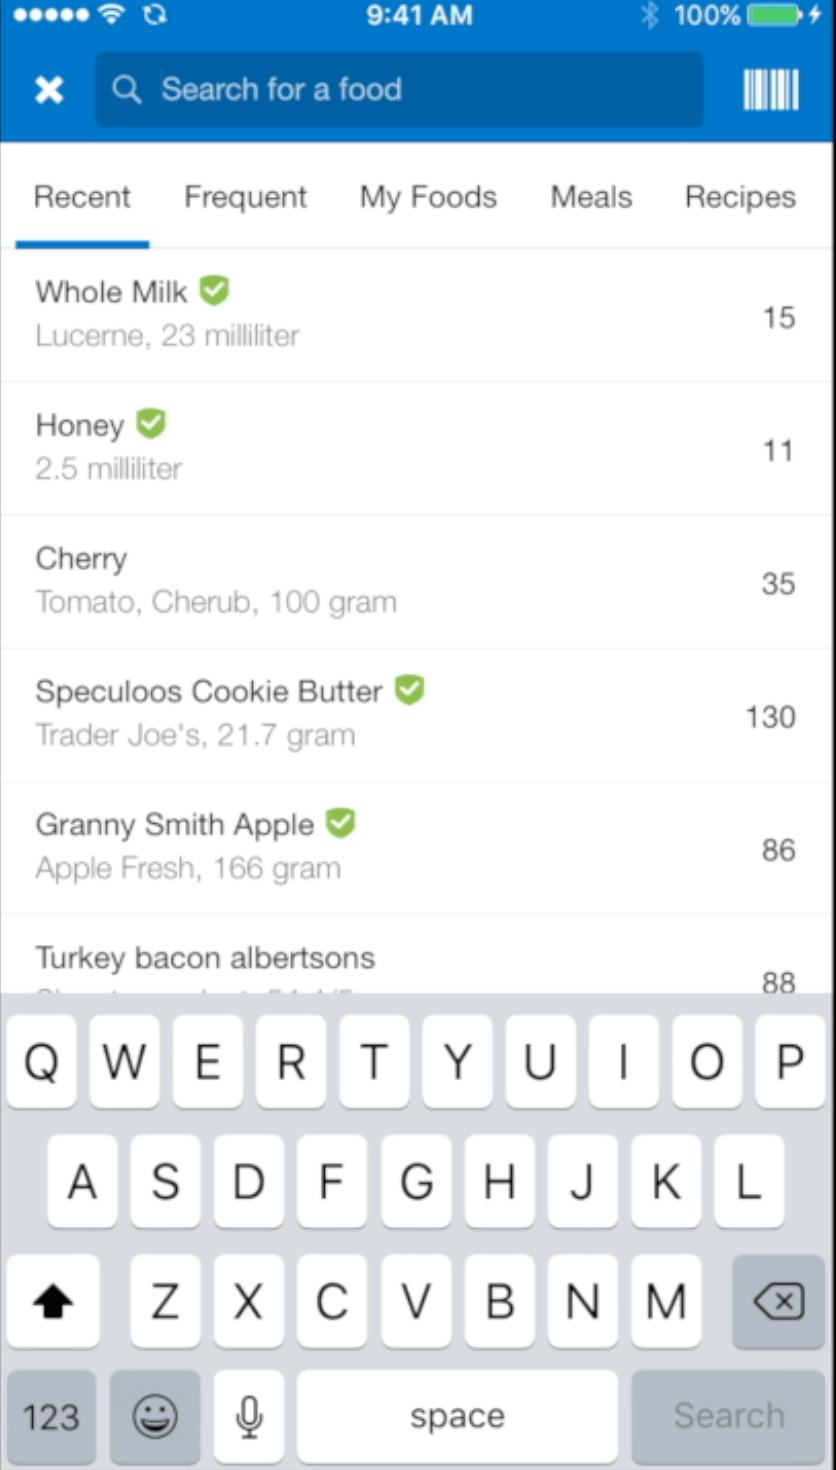
If you’re new to tracking food in MFP, your database of recent, frequent and saved meals and recipes will be empty. To begin adding items, use the search bar in the top of the Add Food page that says Search for a Food.
Enter in the name of the food you’re tracking with as much detail as possible. (E.g. raw or cooked, skin on or off, brand name, etc.) Select Search.
Step 3
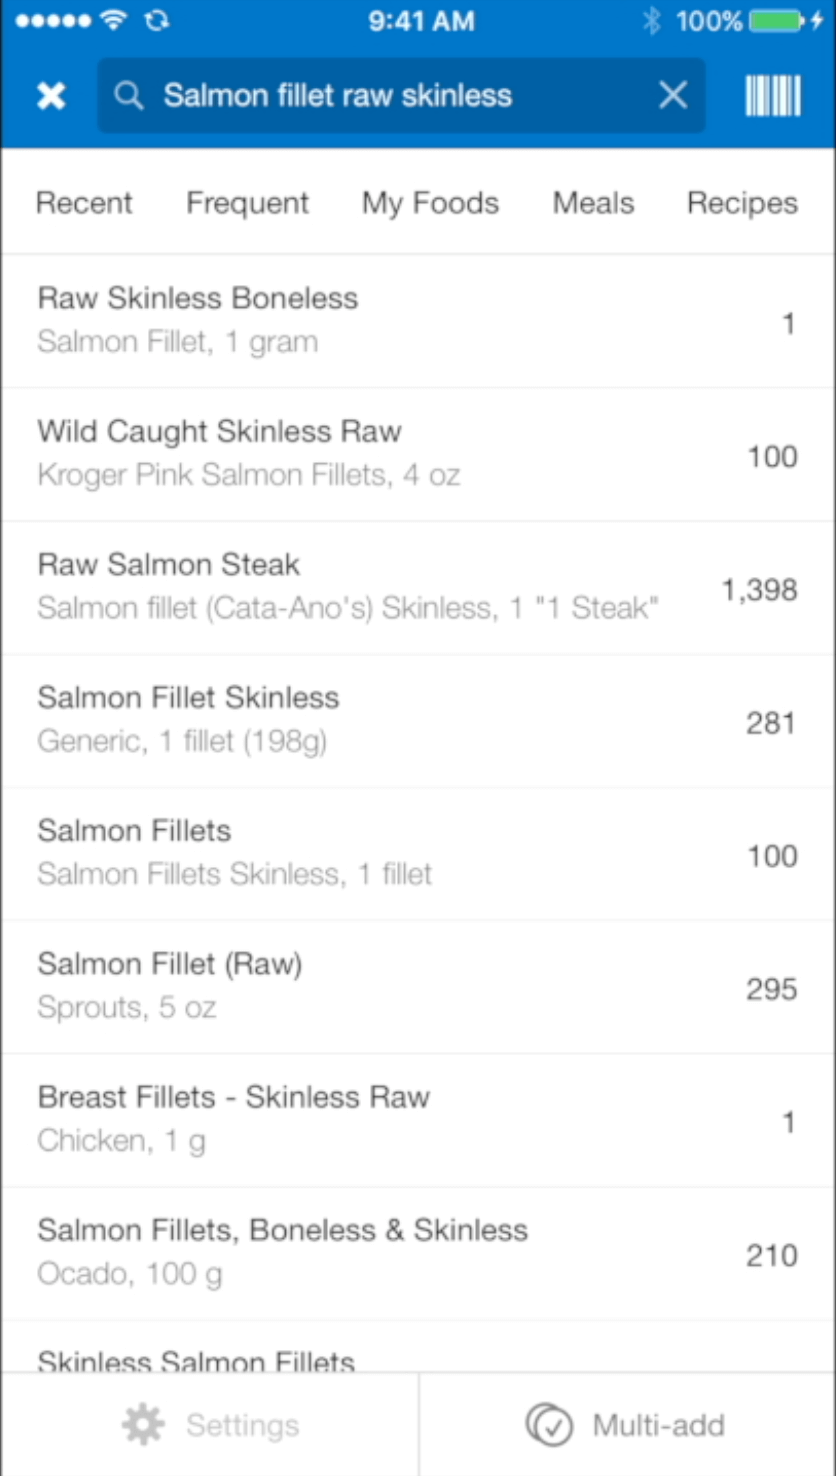
A list of search results will appear. Sift through these to find the item that best matches.
Advertisement
Select the item by tapping on it.
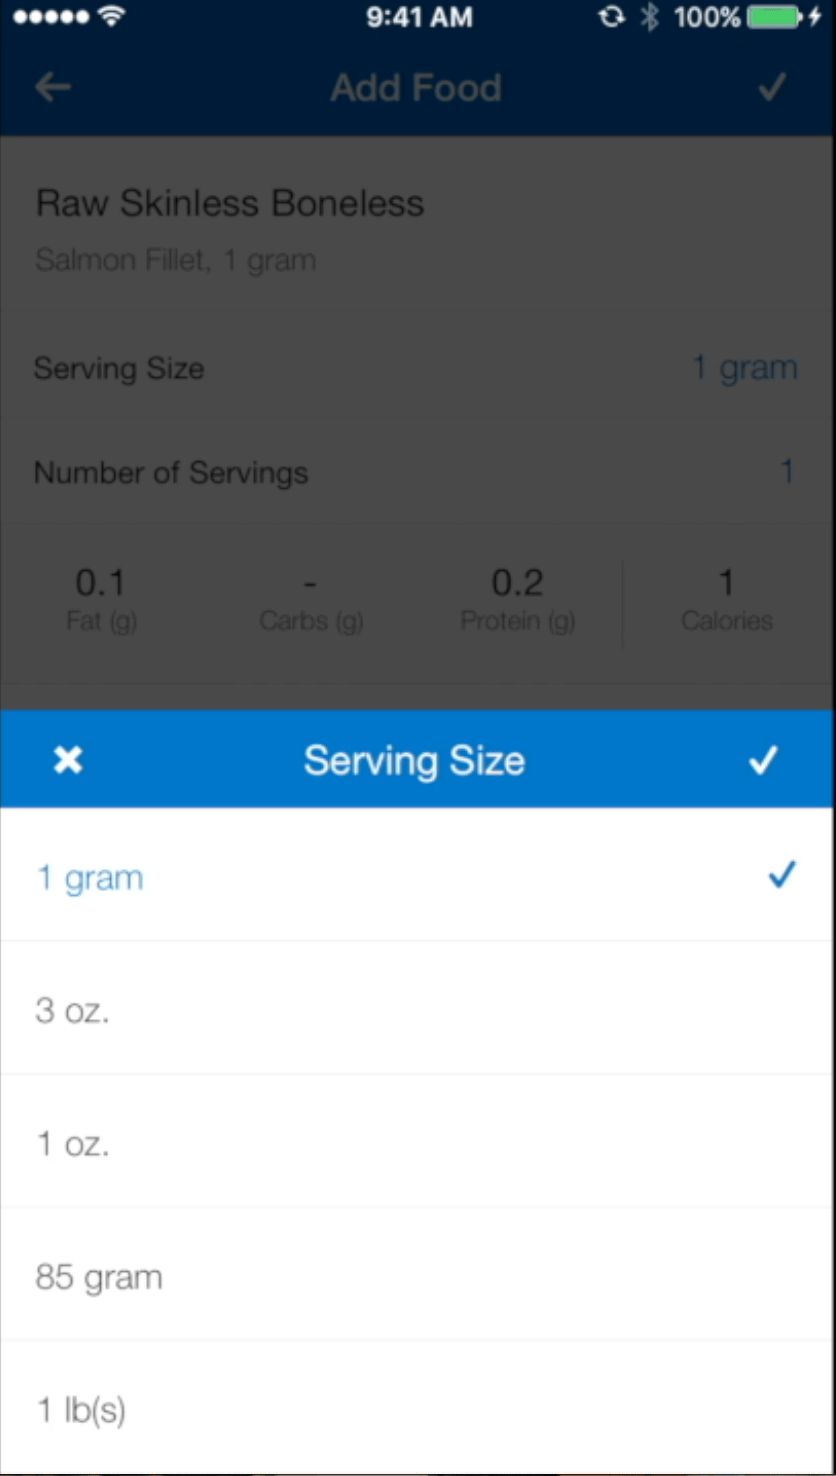
Specify the serving sizes and amounts that you’re logging. Select the check to save the item to your food diary.

When you come across items with the green check in your search results, this indicates that the item is a Verified Food by MyFitnessPal. This means it has been crosschecked and is likely the most accurate option from the search results.
Advertisement
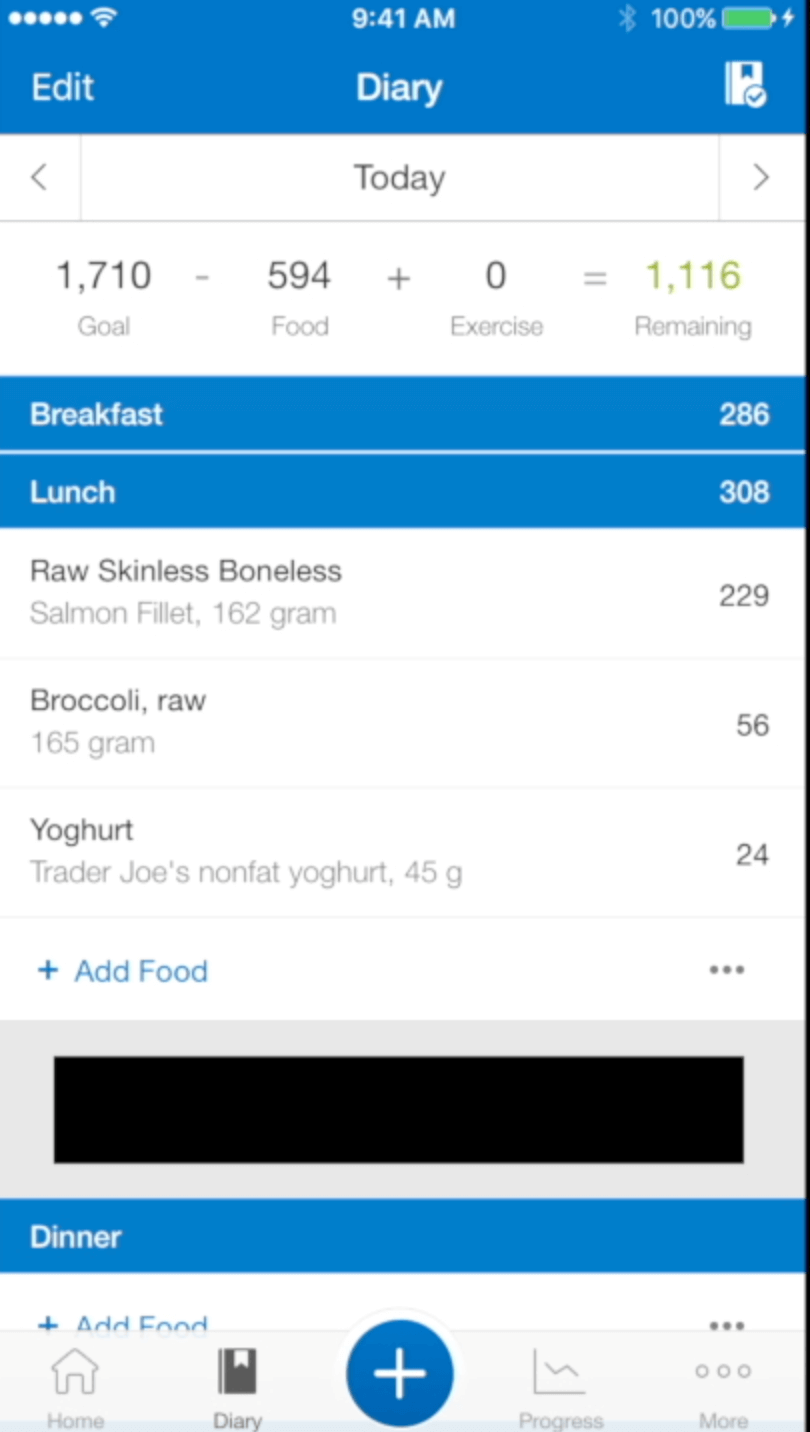
Repeat the process for all individual food items you are tracking. A tracked meal of three items looks like the example above. You can add as many items as you wish.
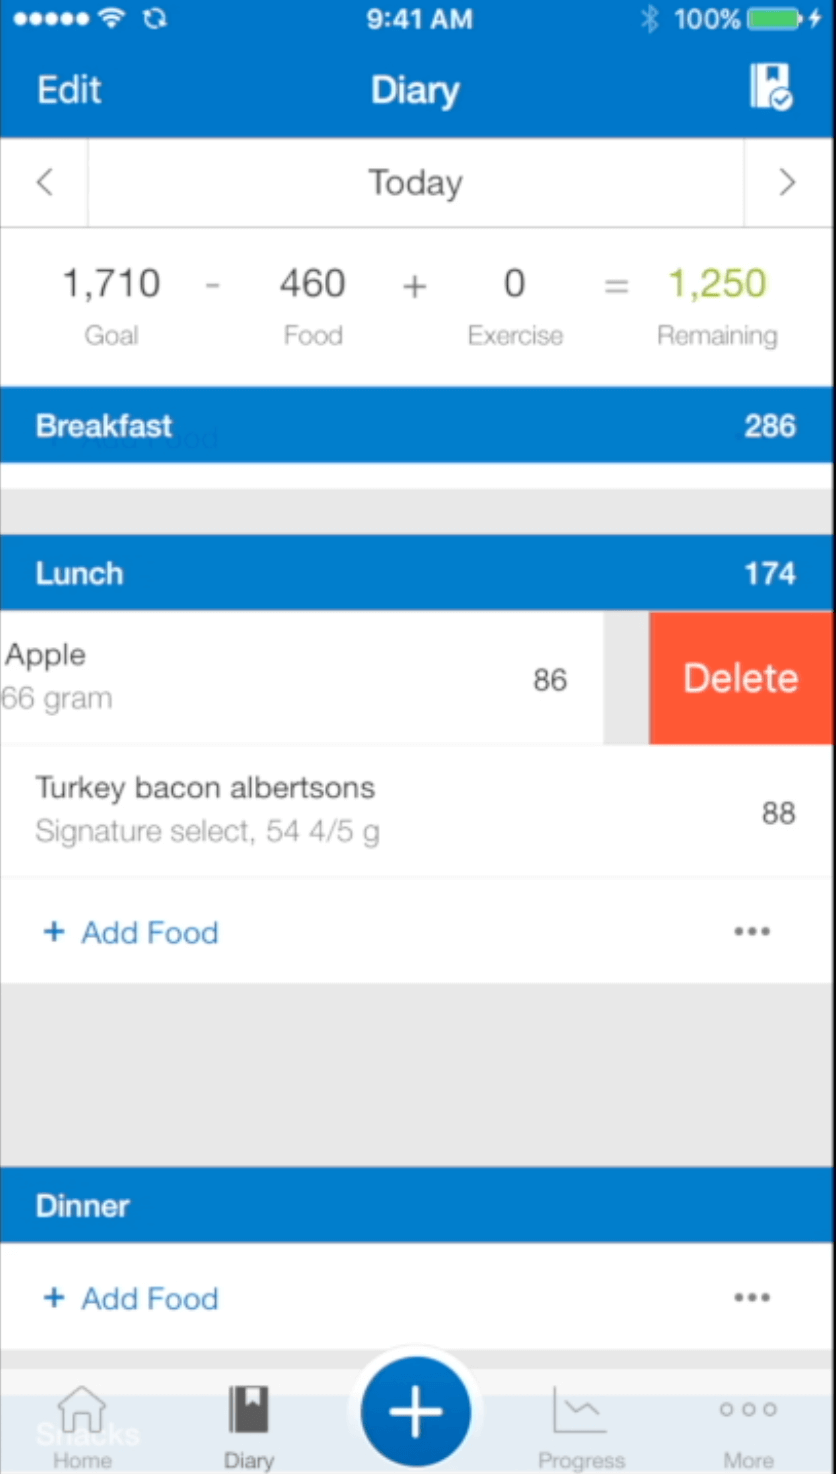
Deleting an item: If you need to delete a food, swipe across on the name of the food entry.
Logging a Recent Meal
Step 1
To repeat a meal that you have previously logged (ex. you are having the same thing for lunch today that you had yesterday) go to your meal heading and select +Add Food.
Advertisement
Step 2
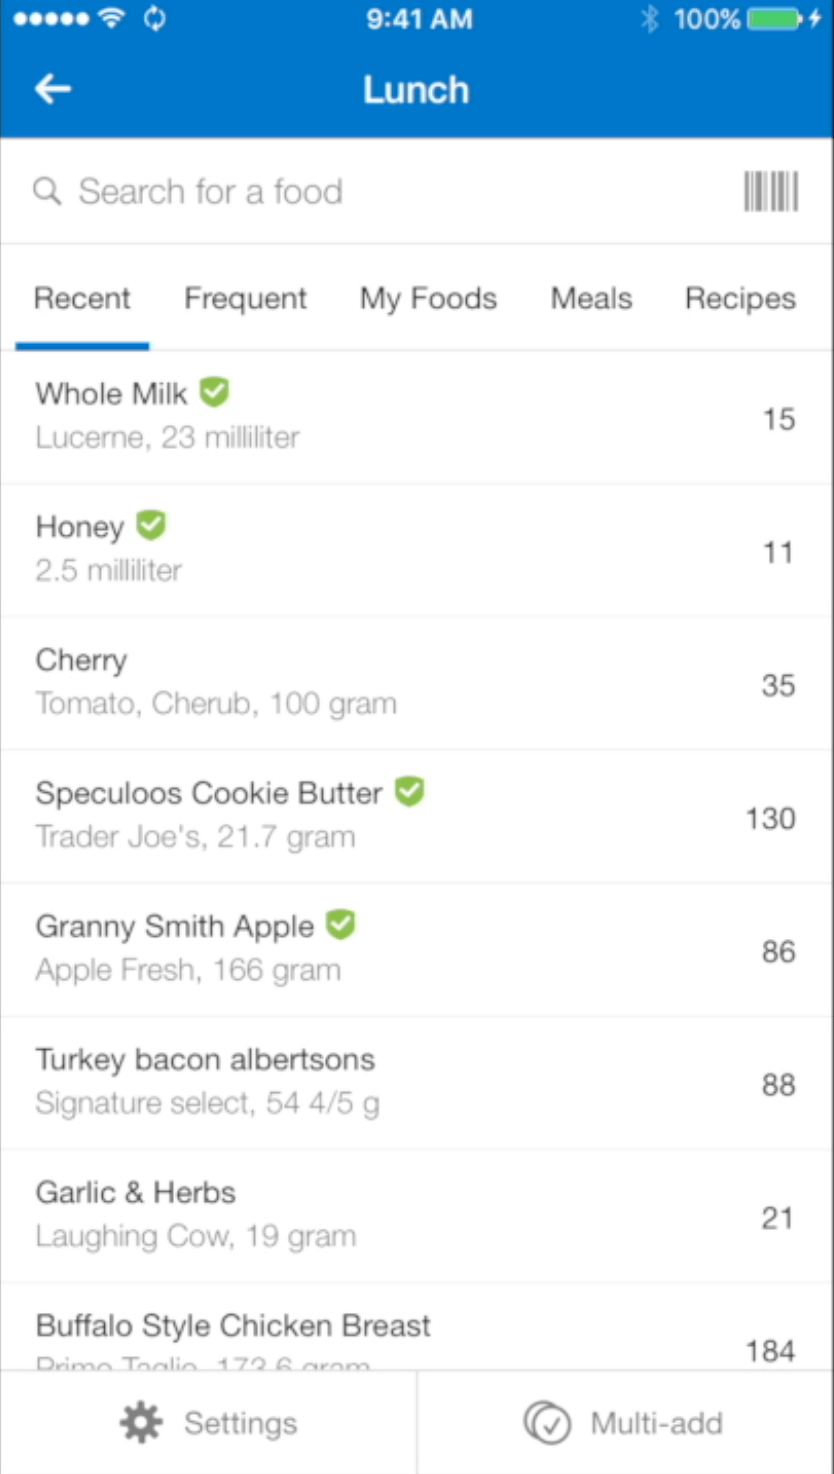
In the top navigation bar, the first list of foods should appear under Recent. By scrolling through this list you will see food items that you recently had for lunch.
Select the food item you want to repeat and, if required, update the serving size.
Saving a Meal for Future Use
Step 1
Scroll through your MFP food Diary and find the meal that you wish to save. In the example above I wish to save this lunch meal of salmon, broccoli and yogurt.
Step 2
At the bottom of the list of food items for that specific meal time (ex. Lunch) tap on the three dots ࣭ᐧᐧᐧ
Advertisement
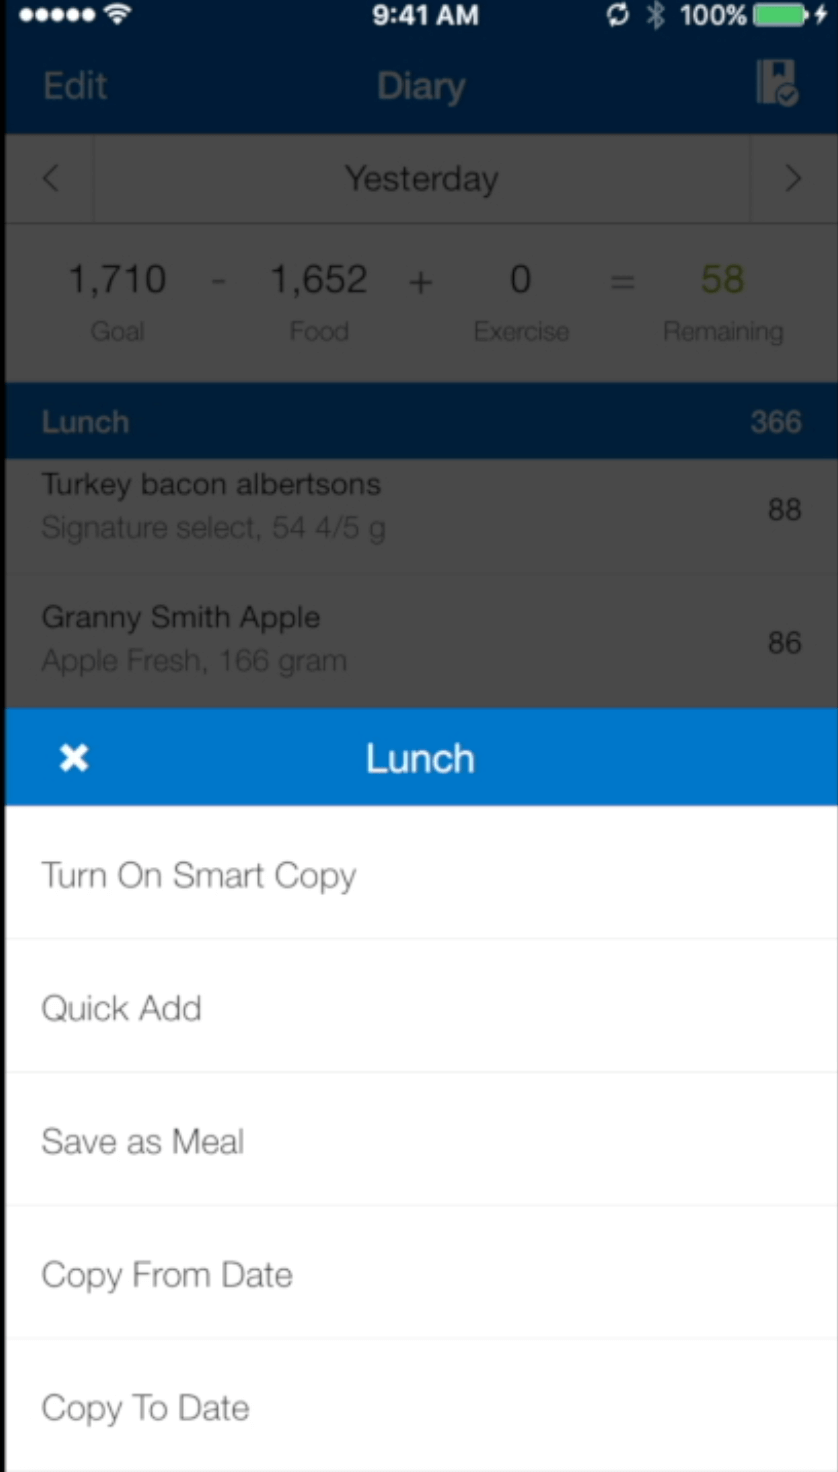
Step 3 A pop up menu appears. Three options down select Save as Meal.
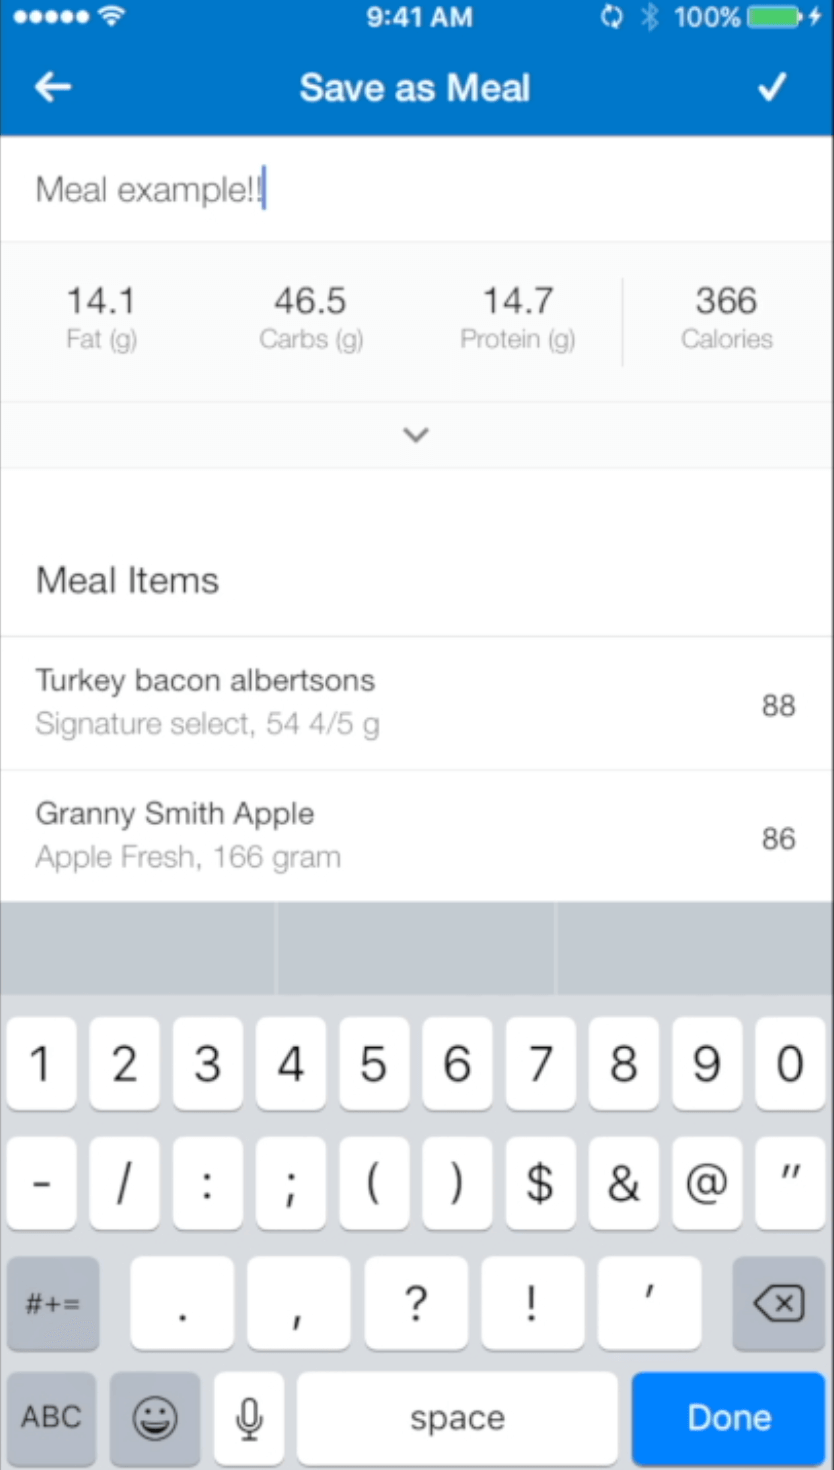
Step 4
Give your meal a name and select the check in the top right corner to save the meal to your Meals database.
Add a Saved Meal to Your Food Diary
Advertisement
Step 1
Select +Add Food under the mealtime you’re logging for (ex. Lunch).
Step 2
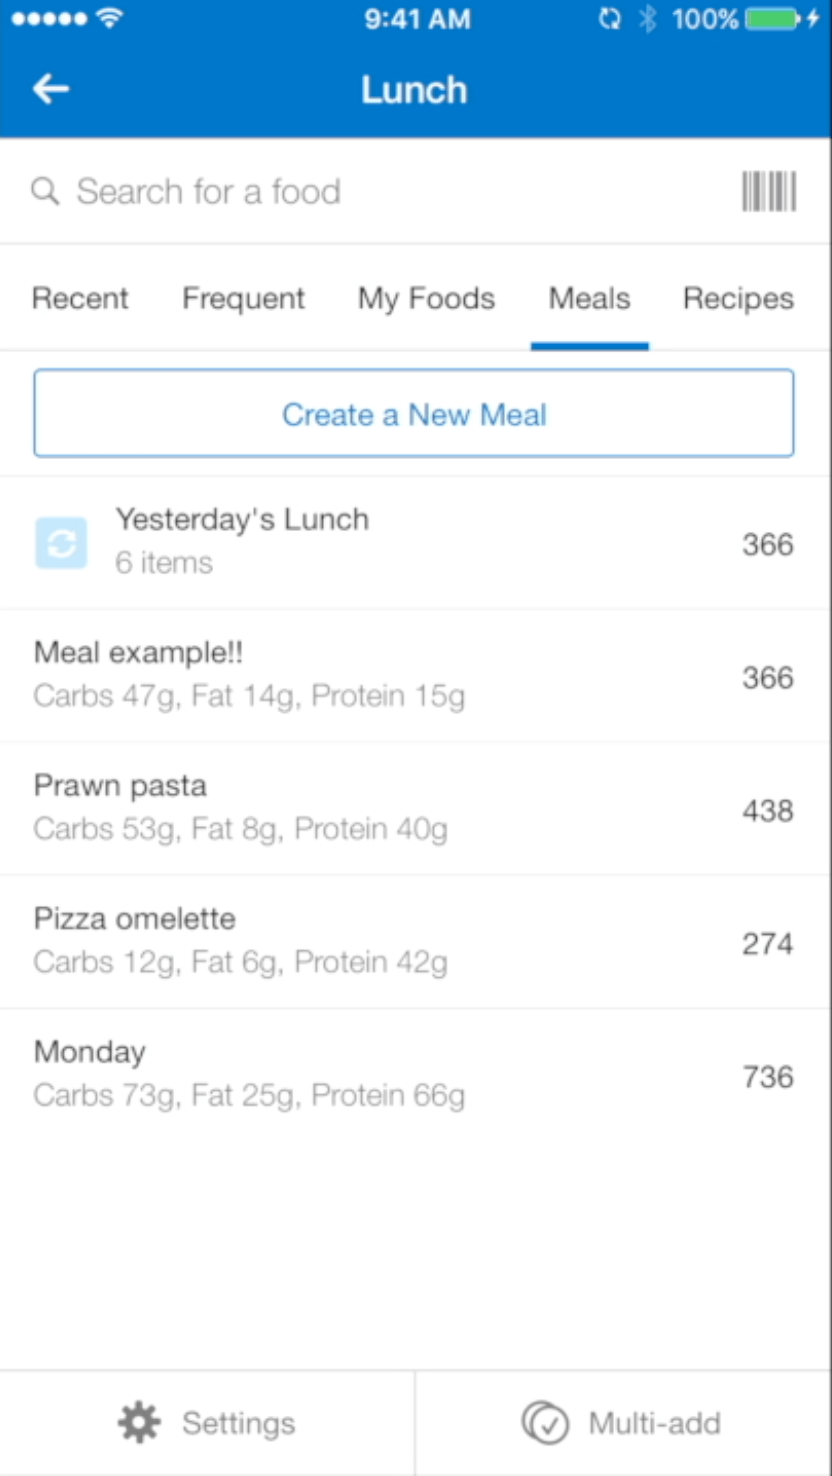
On the Add Food page for that meal, scroll across the top navigation bar to Meals (second from the right).
Step 3
From the list, select the saved meal you wish to log.
Step 4
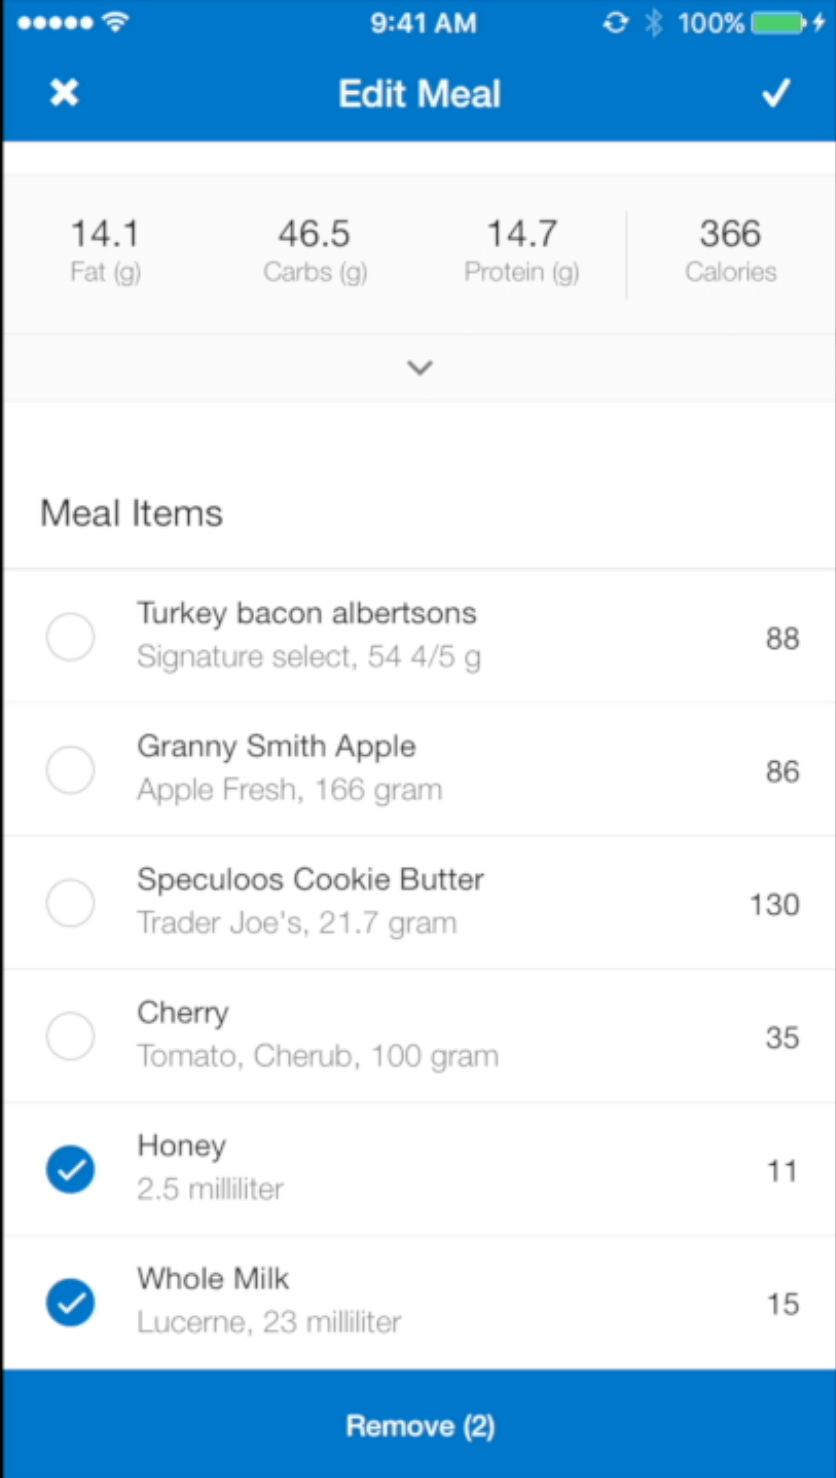
Delete any items from the meal you may not be needing by selecting Edit and then Remove.
Advertisement
Step 5
Select the check to log the meal and it will appear in your food Diary. From here you can change the quantities and serving sizes.
Dani Sheriff
Schedule a Free Intro Call
Working Against Gravity has led the macro tracking and health space for over a decade. Our team doesn’t just understand the science of nutrition—we’ve spent years mastering the art of tailoring it to fit your life. That means no cookie-cutter plans, just real strategies that have worked for over 30,000 people.
Schedule a free call with our team to learn how working with a 1-on-1 WAG coach will help you reach your goals.
