Simple Bone Broth
Medium
Difficulty
49h 0m
Total Time
2
Ingredients
10
Steps
Calories
49
Fat
1g
Carbs
0g
Protein
10g
Serves
10-12 cups
Ingredients
- Beef or chicken bones
- Any desired spices (ex: salt, pepper, bay leaves, turmeric, garlic, lemongrass etc.)
I often wonder, why in the world would anyone drink a protein shake when they could drink bone broth? This warm, flavorful drink is packed with protein and full of nourishment, making it a no-brainer to me.
Bone broth is full of collagen, so it’s the best-kept century-old secret to healthy hair, skin, and nails. It’s even praised for being gut-friendly and supporting the immune system—I mean, hello? Who doesn’t love some chicken soup when they’re feeling sick?
You can buy bone broth in store, or you can save a pretty penny and decrease your environmental footprint by making your own at home by using leftover bones from your weekly meal prep.
For $1.50, I get 3 lbs. of grass-fed beef bones from my local farmers market and it makes three weeks of bone broth. I recommend asking your butcher for bone off-cuts. You can use any bones; in fact, the more foreign the bone is to you, the more nutritious it probably is. Knuckles, feet and marrow-filled are the way to go!
Instructions
Click a step to mark it complete
-
Preheat oven to 400 F. Optional but advised: Fill a large pot with water and bring to a boil. Using tongs, carefully transfer the bones into the boiling water. Boil for 15 minutes. This step helps remove any impurities from the bones. I highly recommend following this step if you’re using things like beef feet, knuckles or marrow, which you should be! Once finished boiling, carefully strain with a colander.
-
Roast the bones. Place the bones on a tray and roast for 30 minutes.
-
Once roasted, carefully transfer the bones into a slow cooker, fill to the top with water and cook on low for 18–36 hours.
-
Optional: Add herbs and spices. Personally, I don’t do this. Instead, I add seasoning to each individual portion. That’s what makes this the quickest and easiest bone broth!
-
Allow to cool for 20 minutes and remove the bones from the pot with tongs, or strain the whole broth into another large pot and catch the bones with a colander.
-
Refrigerate the bone broth overnight, and do it as quickly as possible. You don’t want to let your broth cool slowly because bacteria can grow in it as it cools. I place mine on a cutting board in the fridge so it doesn’t crack my glass refrigerator shelves.
-
Refrigeration allows the fat to separate and float to the top, making it significantly easier to remove from the broth. Use a slotted spoon to skim the fat off the top.
-
Once you remove the main layer of fat, use a cheesecloth and strain the broth once or twice through to remove any excess bones.
-
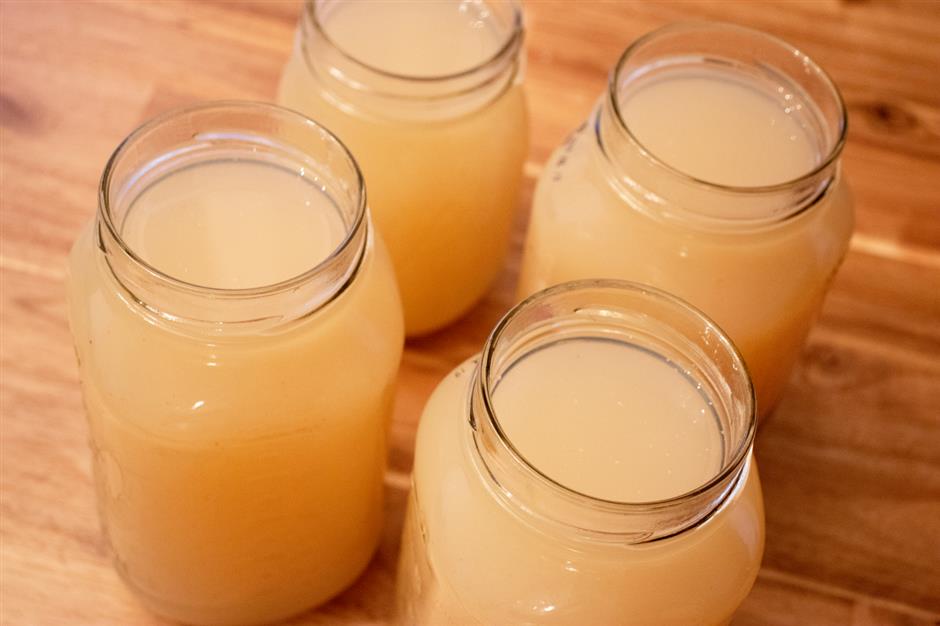
Use a ladle to transfer your bone broth into sealable jars and refrigerate. Your broth should be good for a couple of weeks. Drink up!
-
When you’re ready to drink, add some herbs, spices, salt and pepper and heat for 1 minute and 10 seconds in the microwave.
Sometimes the broth is more gelatin-like and gluggy, sometimes it’s not. I believe this has to do with whether or not you skip the boiling stage, the cuts/bones you used (including if you used lamb, chicken, veal or some other animal, which is fine) and how much collagen was in them. So don’t be alarmed by varying textures. It will become more liquidy when you heat it up to drink.
Want to learn more about tracking other trending food items? Join our one-on-one nutrition coaching program now!
Love this recipe?
Get more recipes delivered to your inbox.
Reviews
No reviews yet. Be the first to leave a review!
Leave a Review
You Might Also Like